Best Blog Post Workflow: How to EASILY Go from Research to Publish in 2024

Are you asking yourself, “How do I create the best blog post workflow so that I can get my article published quickly?”
Blogging can be daunting, believe me I get it!
I have put together the step-by-step process of the blog workflow from research to publication and beyond.
There are a lot of key steps that make a successful blog and we want to be a part of your content marketing journey. We are dedicated to making blogging easier for you, that’s why we created Bramework!
Keep reading to find out the full blog post workflow to create a successful article that engages your readers and targets more leads.

How to Create the Best Blog Post Workflow
The first step in writing a blog is to create a workflow that works for you.
More than 850 million new blog posts are published each month. That’s 10 billion posts a year. In the US, 10% or 31.7 million people will be able to call themselves a blogger. More than 3 out of 4 of internet users read blogs regularly.

Learning how to maximize your blog is more important than ever. I’m going to breakdown the blog workflow from start to finish so you can see the entire process and all that it entails.
Here’s what I will cover:
- Trending topic research
- Keyword research
- Blog title research
- Reference links to include
- Blog outline creation
- Image research and implementation
- Format and fill content
- Add Calls to Action
- First draft review
- Add SEO
- Add social card
- Final edits and review
- Publication and promotion
There is a science behind the flow of writing an article and Bramework has mastered it! I will review how each one plays a role in the success of your content.
Step 1: Research a Trending Topic
Starting a blog post can often start with emotion instead of logic. I encourage you to do your homework first. Blogging can be a rabbit hole that leads to bias opinion.
The goal is to educate your readers, so you will want to pose your blog or your agency as the expert.

Your start of this blogging adventure begins with topic research! Use your idea to find out what people are buzzing about currently.
Is the topic you have in mind trending or popular?
If people aren’t writing about it, it may not be worth writing out. If people are writing about it, you will need to find out if you have a chance to stand out in the rankings.
Bramework can help you find out if your topic is trending simply by using the free Keyword Analyzer tool!
Plug in your topic idea (or keyword) and find out where it ranks amongst other very important things we will find out next!
Step 2: Do Your Keyword Research
Right alongside trending topic research, you will find your keywords play a big role. We talked about the importance of keyword analyzation and implementation, so now it’s time to put it into the blog post workflow.
Once you find that your topic is trending, it’s time to put your keywords into action.
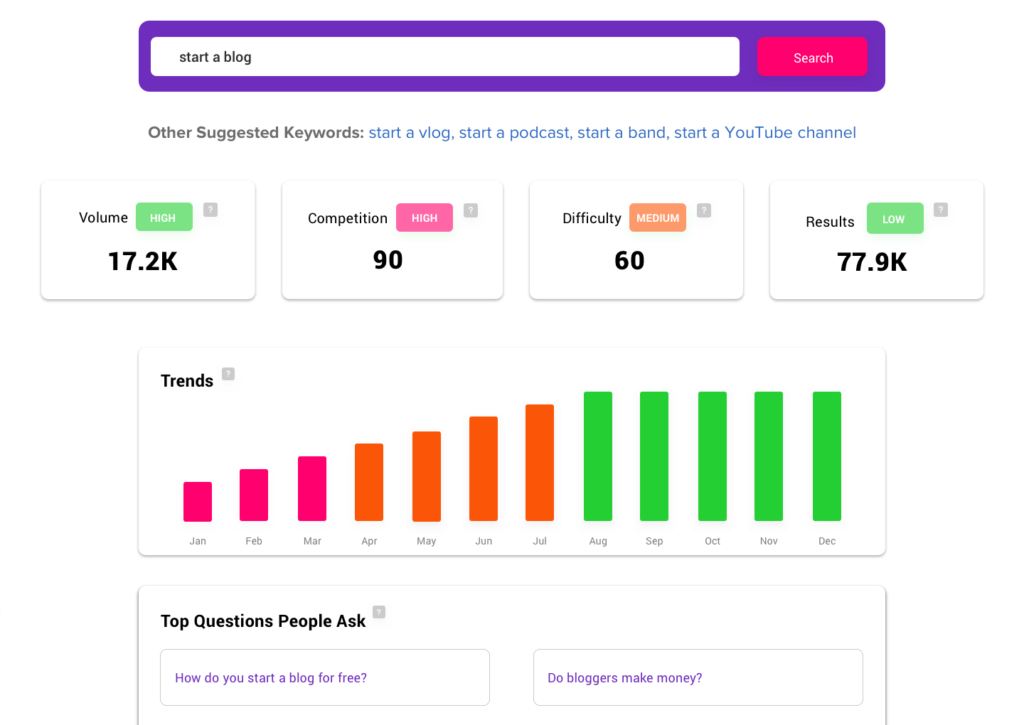
Take your primary or secondary keywords and plug them into the Bramework Keyword Analyzer tool to see how they rank, what competitors are using them and how difficult it will be for the search engines to find your article.
Step 3: Choose the BEST Blog Post Title
Congrats! You now have a topic and keywords to start your blog.
Your blog title is the forefront of your content strategy and should be taken seriously. Picking a title out of the top of your head should not be in your blog workflow. It’s time to evaluate your blog title to optimize reach!
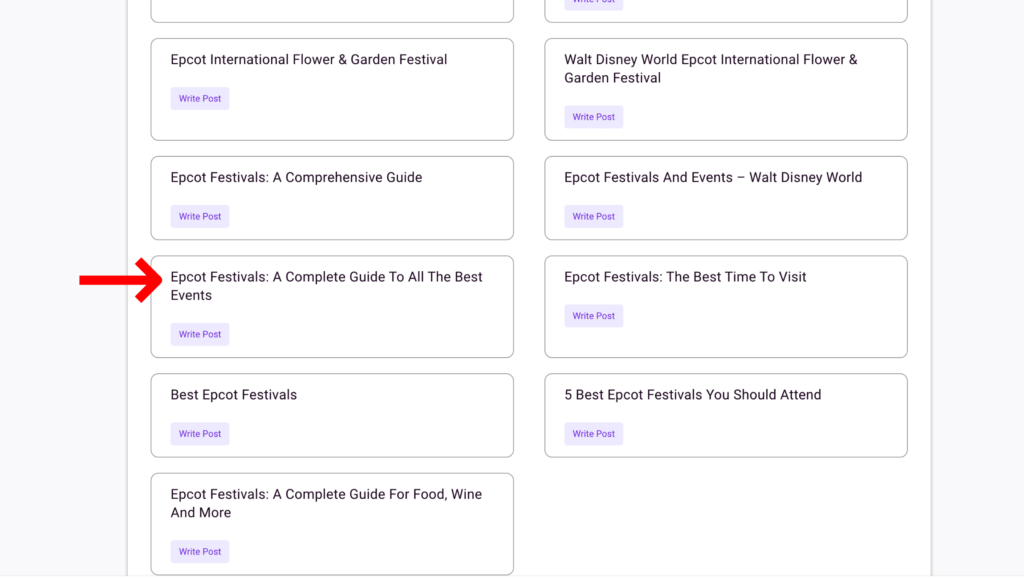
The goal is to engage your reader right from the start! Ask questions, include keywords or offer tips in your blog title to increase readability.
Bramework has you covered there as well – you can review your blog title, compare it with other similar blogs and evaluate alternative titles to use. If you need some help coming up with blog titles, check out this article.
Step 4: Create a Reference Cheat Sheet
What are reference links to include, you ask?
References, in this case, are not people that will get you a job. They are referring sources that you are linking to in your article to add additional value.
Reference links are resources that should be thought of as supportive of your topic, not competitive and can be used as a bridge to build relationships. Also called “influencer links”.

As I mentioned, it’s important to learn how to build links and partnerships to be successful in your content strategy. This includes both internal and external links in your blog.
The internal links are previous articles written by your company that add value. The external links are cited articles from outside sources that will add value and build partnerships. Be sure to include both so you can build trust with your readers.

A great way to do this is as you research your keywords and topics, keep a list of the resources you would like to include (both internal and external). Then as you review the blog, you can add them where you see fit.
Adding internal and external links to your blog workflow will add value to your content, build trust with your readers and bridge new partnerships.
Step 5: Blog Outline Creation
It’s time to start your blog outline! Remember when you wrote a book report in school? It’s a lot like that!
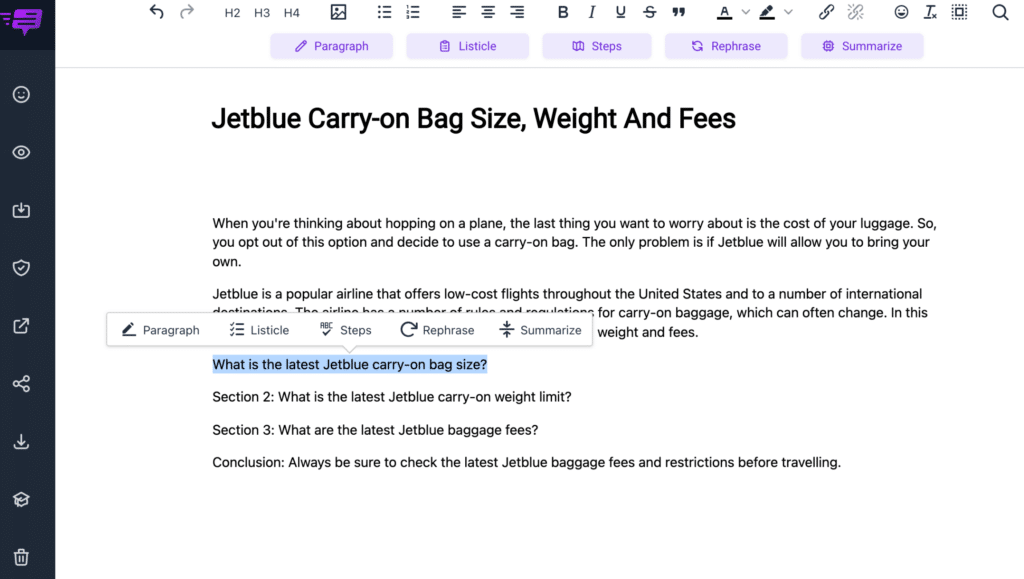
This can take many forms, however, if you are working in WordPress it can be simple!
Create a new post and start to build out your topics and keywords through titles, headings and subheadings.
You can also start a draft in Bramework using our Blog Post Outline Tool that will give you a good structure to your blog.
How Do You Structure a Good Blog? A blog outline includes the following:
- Blog title
- Intro (Summary optional)
- Headings
- Subheadings (optional)
- Images
- CTAs
- (*Repeat these steps for length)
- Conclusion
*You should repeat this process for longer articles. Aim for three headings if possible! The more value you can bring to your readers the better. Keep reading to access the Bramework Blog Writing Checklist to help form your outline.
Step 6: Find the BEST Images and Infographics for Your Blog Post
Images are equally important in the blog workflow as the content itself!
I often see articles where there are no images and it really diminishes the visual learning of the article.

Keep in mind that many blog readers are skimming, which means you need to optimize your content for all different types of learners.
Why are Images So Important to Your Blog Post?
Images break up the article and encourage time on page. This helps the search engines to index the article, getting it in front of more readers.

My advice is to use free resources like Unsplash, Pexels or Pixabay for high-quality images. The important part about including images is to make sure you are adding in the Title, Alt Text and description of the image for the proper search index.
If you’re interested in using branded images for your content, you can use tools like Canva for creative designs. It’s great to have a mix of them all!
In the blog workflow, your images are equally important to the content itself!
Step 7: Format and Fill in the Content
Your outline is set and your building blocks are in place. Formatting your blog could make or break the engagement needed to drive traffic to your website.

The good news is that you have a tool (at Bramework) that can help with that too! Consider our tool a plug and play instrument that helps guide you through the entire process of filling in your content.
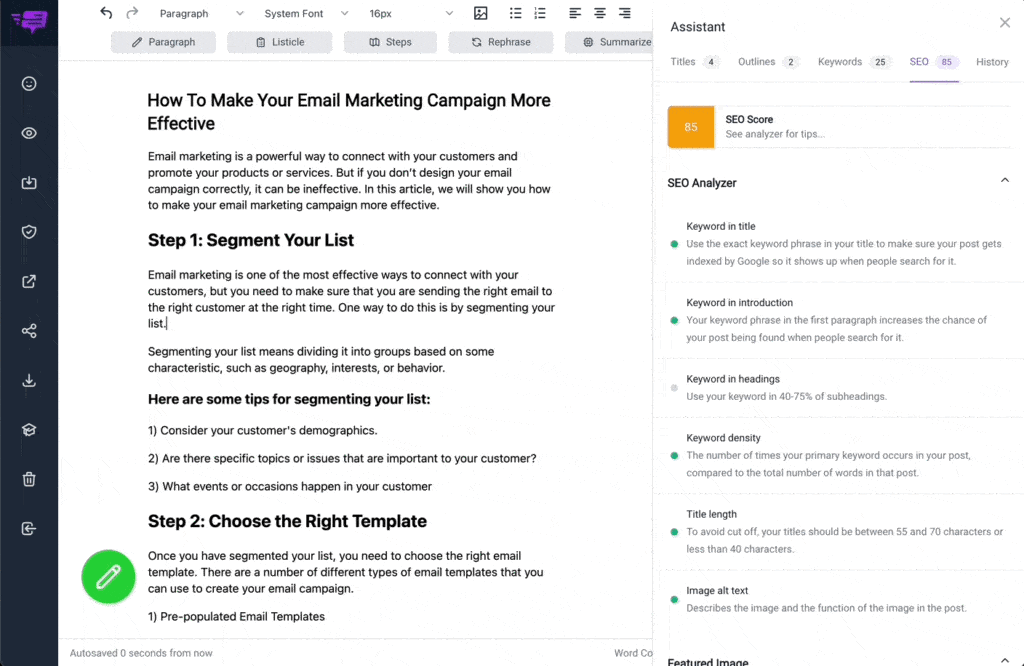
Your formatting should be consistent with your vision and build brand awareness. Be sure to keep your font streamlined, your brand colors synced and your voice heard throughout. Format your blog to fit your personality!
Things to remember for formatting your blog post:
- Choose the best categories for your blog post
- Update the tags
- Add the featured image
- Have the appropriate Headings and Subheadings with supporting keywords
- Space out the paragraphs of your article
Step 8: Add Calls to Action
Blogs are not just for reading anymore! Content marketing is about educating your readers and obtaining a loyal following. As HubSpot’s inbound methodology states – Attract, Engage, Delight. Your blog is the “attract” portion of the method.

To attract more visitors that could turn into delighted and loyal customers, you will want to provide a valuable call to action.
What is a Call-To-Action (CTA)
A call to action is a marketing term designed to prompt a response or encourage an immediate sale.
The CTA most often refers to the use of words or phrases that can be incorporated into sales scripts, advertising messages or web pages that encourage consumers to take prompt action.
If a visitor is reading your blog about “how to write a blog post that converts more leads”, a great call to action would be…
Step 9: Edit Your First Draft
At this point, your blog post should be filling out quite nicely! It’s time to run through it with a fine-toothed comb to see if there is a first round of edits.

We highly recommend writing the bulk of your article and setting it aside prior to doing the first round of edits.
There is something to be said about writing a large chunk of material, then letting it sit and coming back to it for editing with a fresh pair of eyes.
Your first draft blog post edits should include the following:
- Does your article include 5 – 10 of your keywords?
- Is your formatting consistent and on-brand?
- Did you include relevant reference links?
- Does your article stick to its original objective (without going off on tangents)?
- Finally, does your blog post need more or less content?
When reviewing the first draft of your blog, don’t be afraid to make big edits.
Step 10: Optimize Your Blog Post with the Best SEO Standards
As we all know, getting Google to take your blog seriously…needs to be taken seriously.
We have learned the importance of keyword placement, we’ve learned about building links and how important it is is to evaluate your competition. Now it’s time to put your SEO (Search Engine Optimization) knowledge to work.

In the WordPress world, you will want to use tools like Yoast, Jetpack or SEOPress to help build your SEO for each post.
Each one will have a slightly different input but the underlying concept is the same. You will need to plug in your keywords, key phrases or key topics in the admin panel.
PRO TIP: Don’t forget, things like adding ALT text to images, including titles also help to build SEO.
Step 11: Add Social Cards
If you’re writing an EPIC blog post (which you are), you will want to share it with the social world. It’s important to format it so that it’s easy to share with all the correct information.

If you have set up social share buttons (recommended), that means that when someone clicks to share it should populate a social card.
Social Cards, also known as Social Previews, allow you to choose the image, title, and description that will display on social media platforms when you or someone else shares your content.
You can set up your social cards by providing your blog admin panel with the title, meta description and featured image so that when it’s shared it will auto populate.
This increases the chances of engagement and sharability. For more best practices on blogging check out the ultimate guide that Bramework put together.
Step 12: Final Edits and Review
You are almost ready for publication, however, one of the most important parts of the blog workflow has yet to happen!

The final edits and review are imperative for your blog to be successful.
The final blog post edits will include the following for review:
- Do your primary and secondary keywords appear throughout the article?
- Is your keyword in at least 2 of the headings?
- Did you stay on your objective throughout?
- Were you able to properly format the spacing of the article in preview mode?
- Are your paragraphs bitesize or bolded to optimize readability?
- Have you reviewed the blog post for spelling and grammar errors?
- Did you include external links that open in a new tab?
- Have you included valuable CTAs?
- Did you include high-resolution images with appropriate ALT text and title?
- Were you able to include SEO and social cards?
- Have you included a compelling conclusion?
- Did you have a second pair of eyes read through it?
Step 13: Publish and Promote Your Blog Post
Time to hit publish! Phew, take a deep breath because it’s always fun to hit publish when you feel your blog is ready.
Knowing when to publish should also be researched. Every industry is different, so you will want to publish on a date and time that is optimal for your target audience.
Keep in mind time zones, business work flow and optimal reading times. You’ll also want to keep in mind as you publish, promotion is next and you will want to share right away (and repurpose it later).
When your blog is live, it’s time to promote! Share it with everyone, every way you can.
8 Ways to Promote Your Blog Post:
- Social media
- Your personal network
- An email newsletter
- On another blog
- Share on a webinar, podcast or other media
- Your referral partners
- Affiliate marketers
- Sharing again and again…
We take blogging very seriously here at Bramework. That’s why we put together this blog writing checklist.
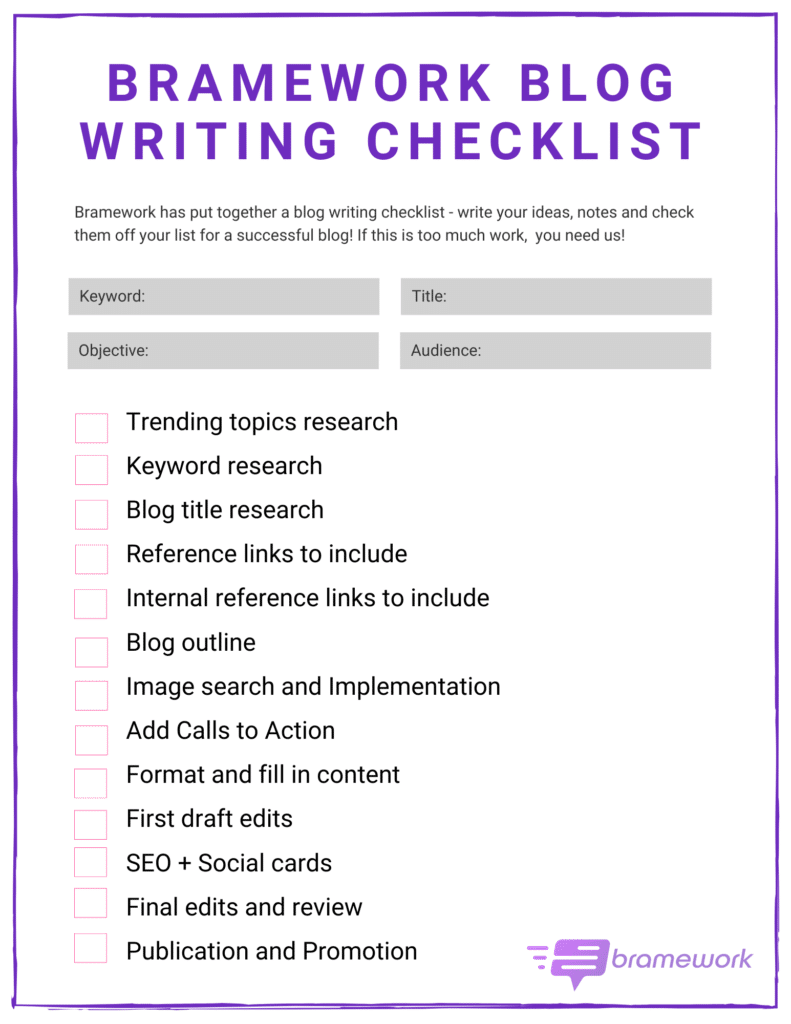
We hope this helps you format your blogs for success. If you feel that you don’t have time, energy or resources to write successful blogs, Bramework can help. it’s what we do.
Final Thoughts on Creating the Best Blog Workflow
Creating a blog post workflow is a lot of work!
Writing a blog takes a lot of time and should be done right. If you feel we could save you time, please reach out to us at Bramework. We are dedicated to saving you time, energy and money!

We make blogging our business. Our goal is to help you create an INCREDIBLE blog in half the time.
With our free keyword analyzer, you will have all the research and implementation tools you need in one place. Then you can start your blog workflow all in the Bramework tool from start to finish.
UP NEXT: 41 Incredible Benefits of Blogging (Why Content is Important)
Image credit: unsplash.com, bramework.com
(Original Article Date: April 14, 2020/Updated by Editor on December 8, 2022)


This is a very detailed article how to go from starting a blog post to posting it. One idea that we have recently changed in our process is that we create special images for the social card and social posts. We do not use the “normal” featured image but create a “special” image that includes text in order to draw more attention to our content within the social feed of the user. The text can be the title, an important information etc from the blog post.