Bramework WordPress Plugin
Step 1 – Downloading Bramework Plugin
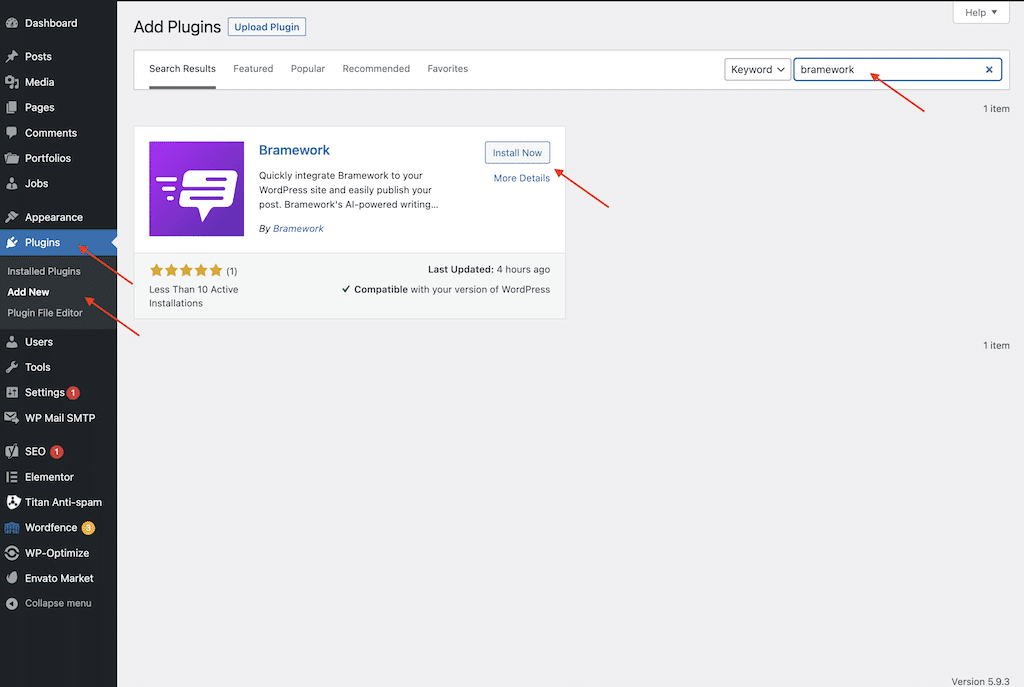
Log into your WordPress website. From the left navigation bar, go the plugin section and click “Add New”. Then from the right search bar input “bramework” and enter to search.
Step 2 – Install and Activate Bramework Plugin
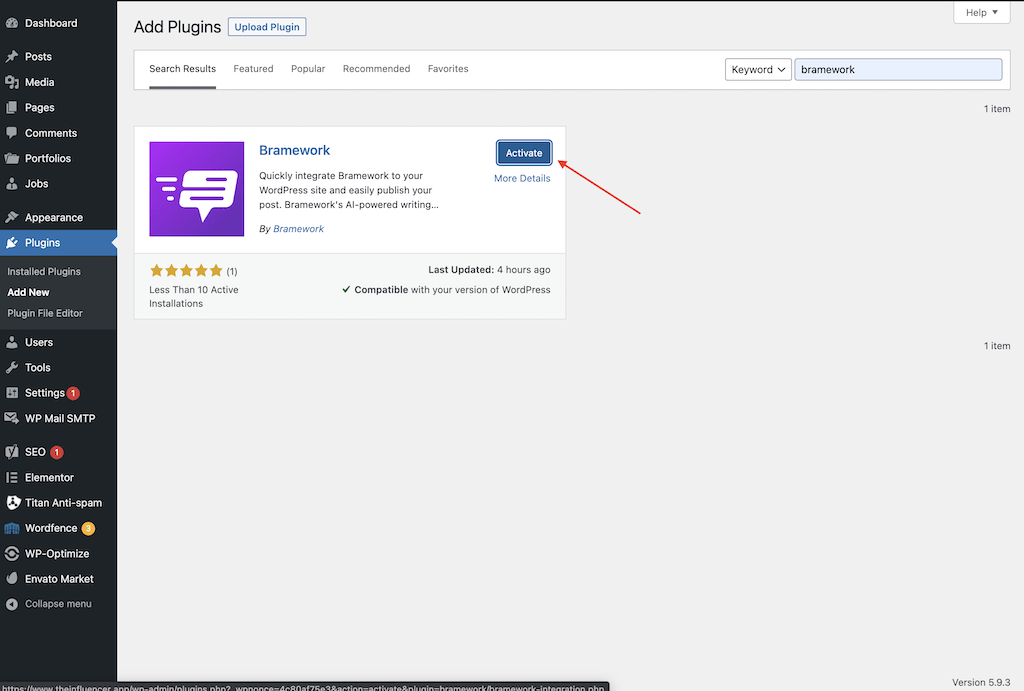
Next, click to activate and install the plugin.
Step 3 – Connect Bramework and WordPress
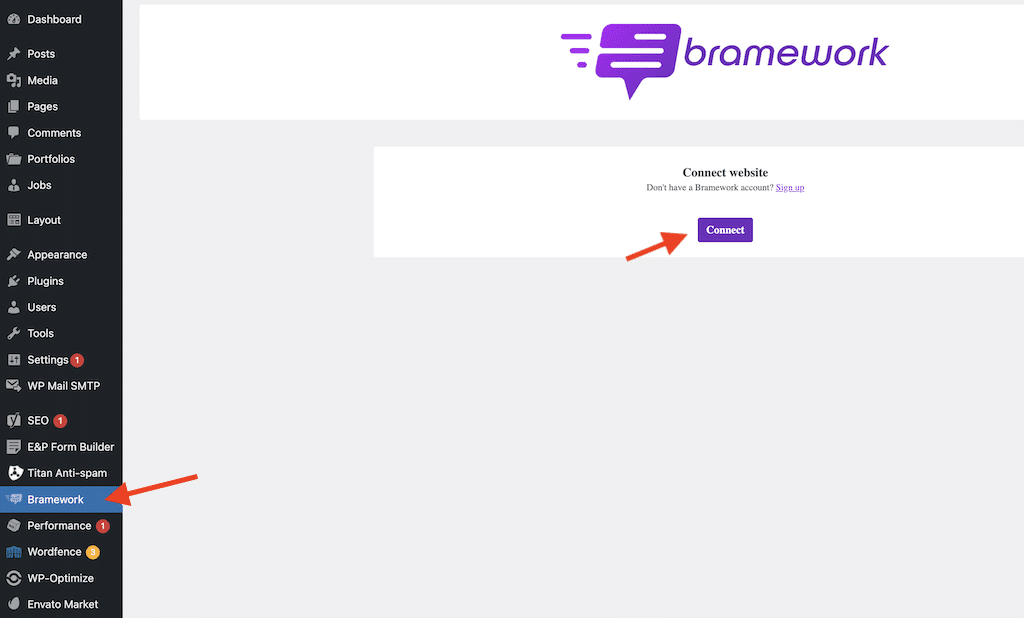
From the left navigation bar, go to the Bramework section and click “Connect”. Then wait while the authorize page loads.
Step 4 – Authorize Bramework and WordPress Connection
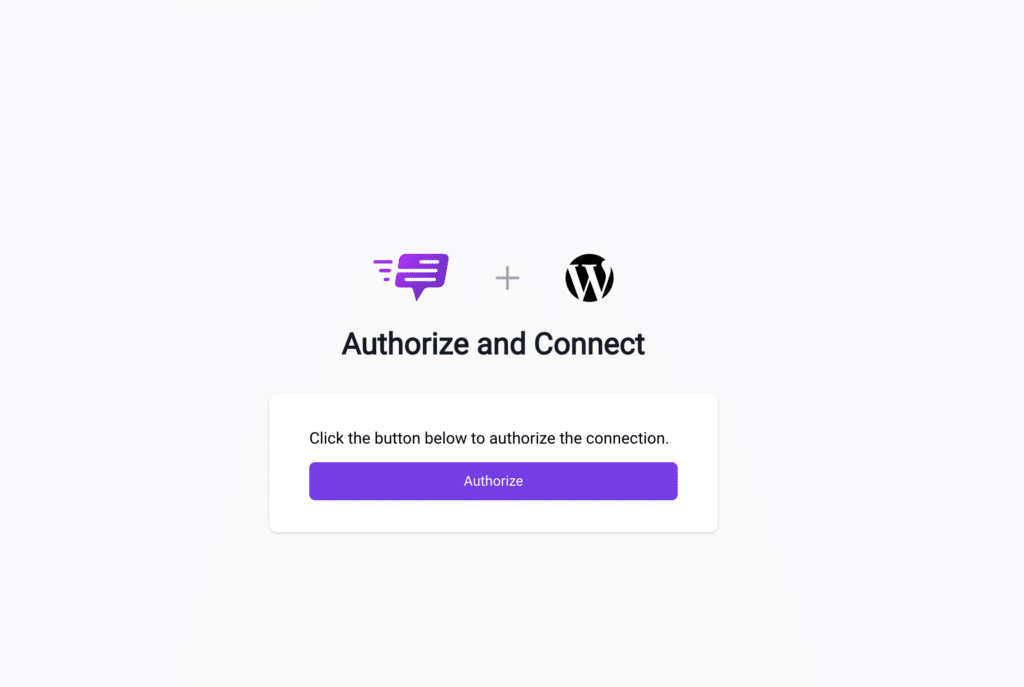
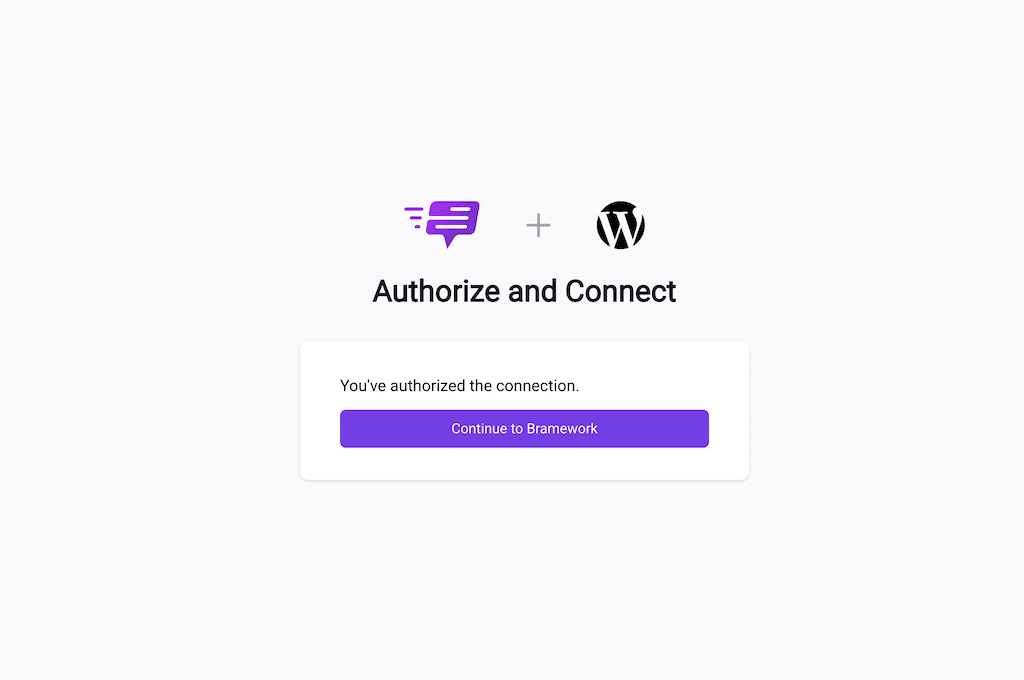
If you’re already logged into Bramework, click the “Authorize” button to connect then “Continue to Bramework”.
If you’re not logged in, please log in, then click the “Authorize” button to connect then “Continue to Bramework”.
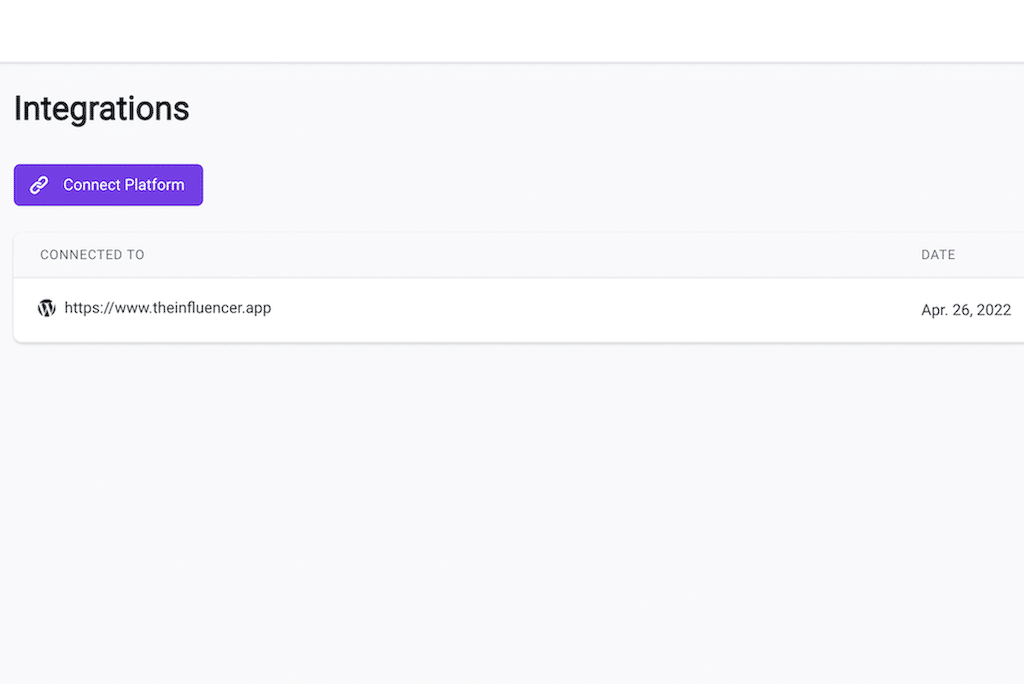
You’ll be redirected to the Bramework integration page. There you can confirm your connection.
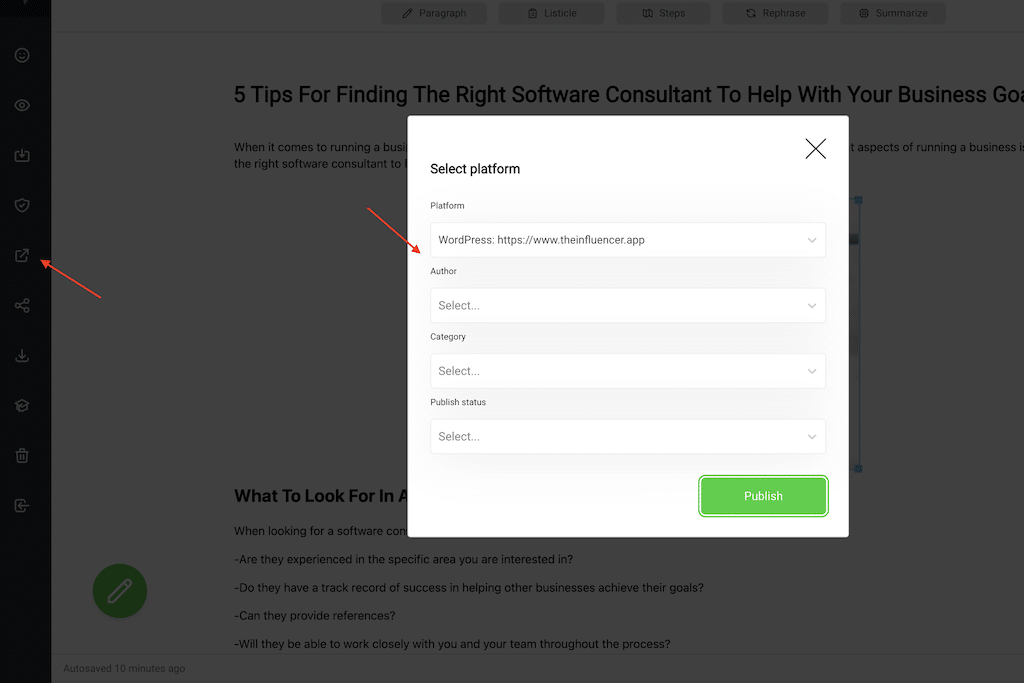
Step 5 – Publish Your Post
Now go to any post you’d like to publish to your WordPress site, select all required field and publish.
How to connect Bramework to my WordPress site
If you’re experiencing any issues, please contact us and we’ll gladly walk you through the integration process.
Important note: Due to the varied configurations of WordPress websites, we cannot guarantee that our plugin will be able to connect and publish to them. You may have a plugin, firewall, or server setting that is blocking our API connection. Additionally, if your website is hosted on a shared server, the hosting provider may restrict certain integrations. If you encounter any of these issues, please reach out to your website hosting provider for further support.
Thanks for using Bramework!
Updated: February 12, 2023